Accounts
Accounts are the chargeable entities created in the Report creation and preparation step based on the key columns selected from the Dataset.
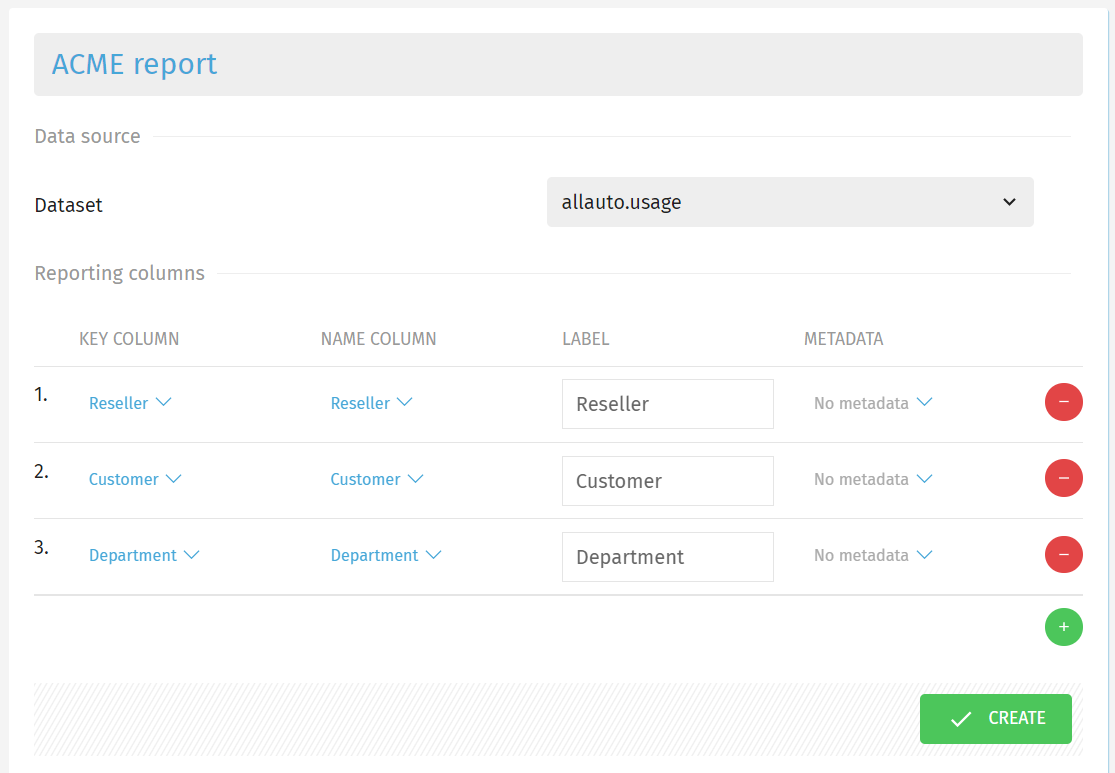
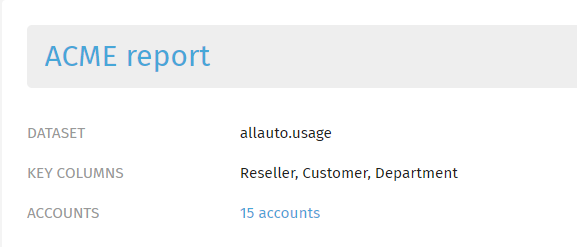
For this report, the selected key columns which will dictate the Accounts are Reseller, Customer and Department.
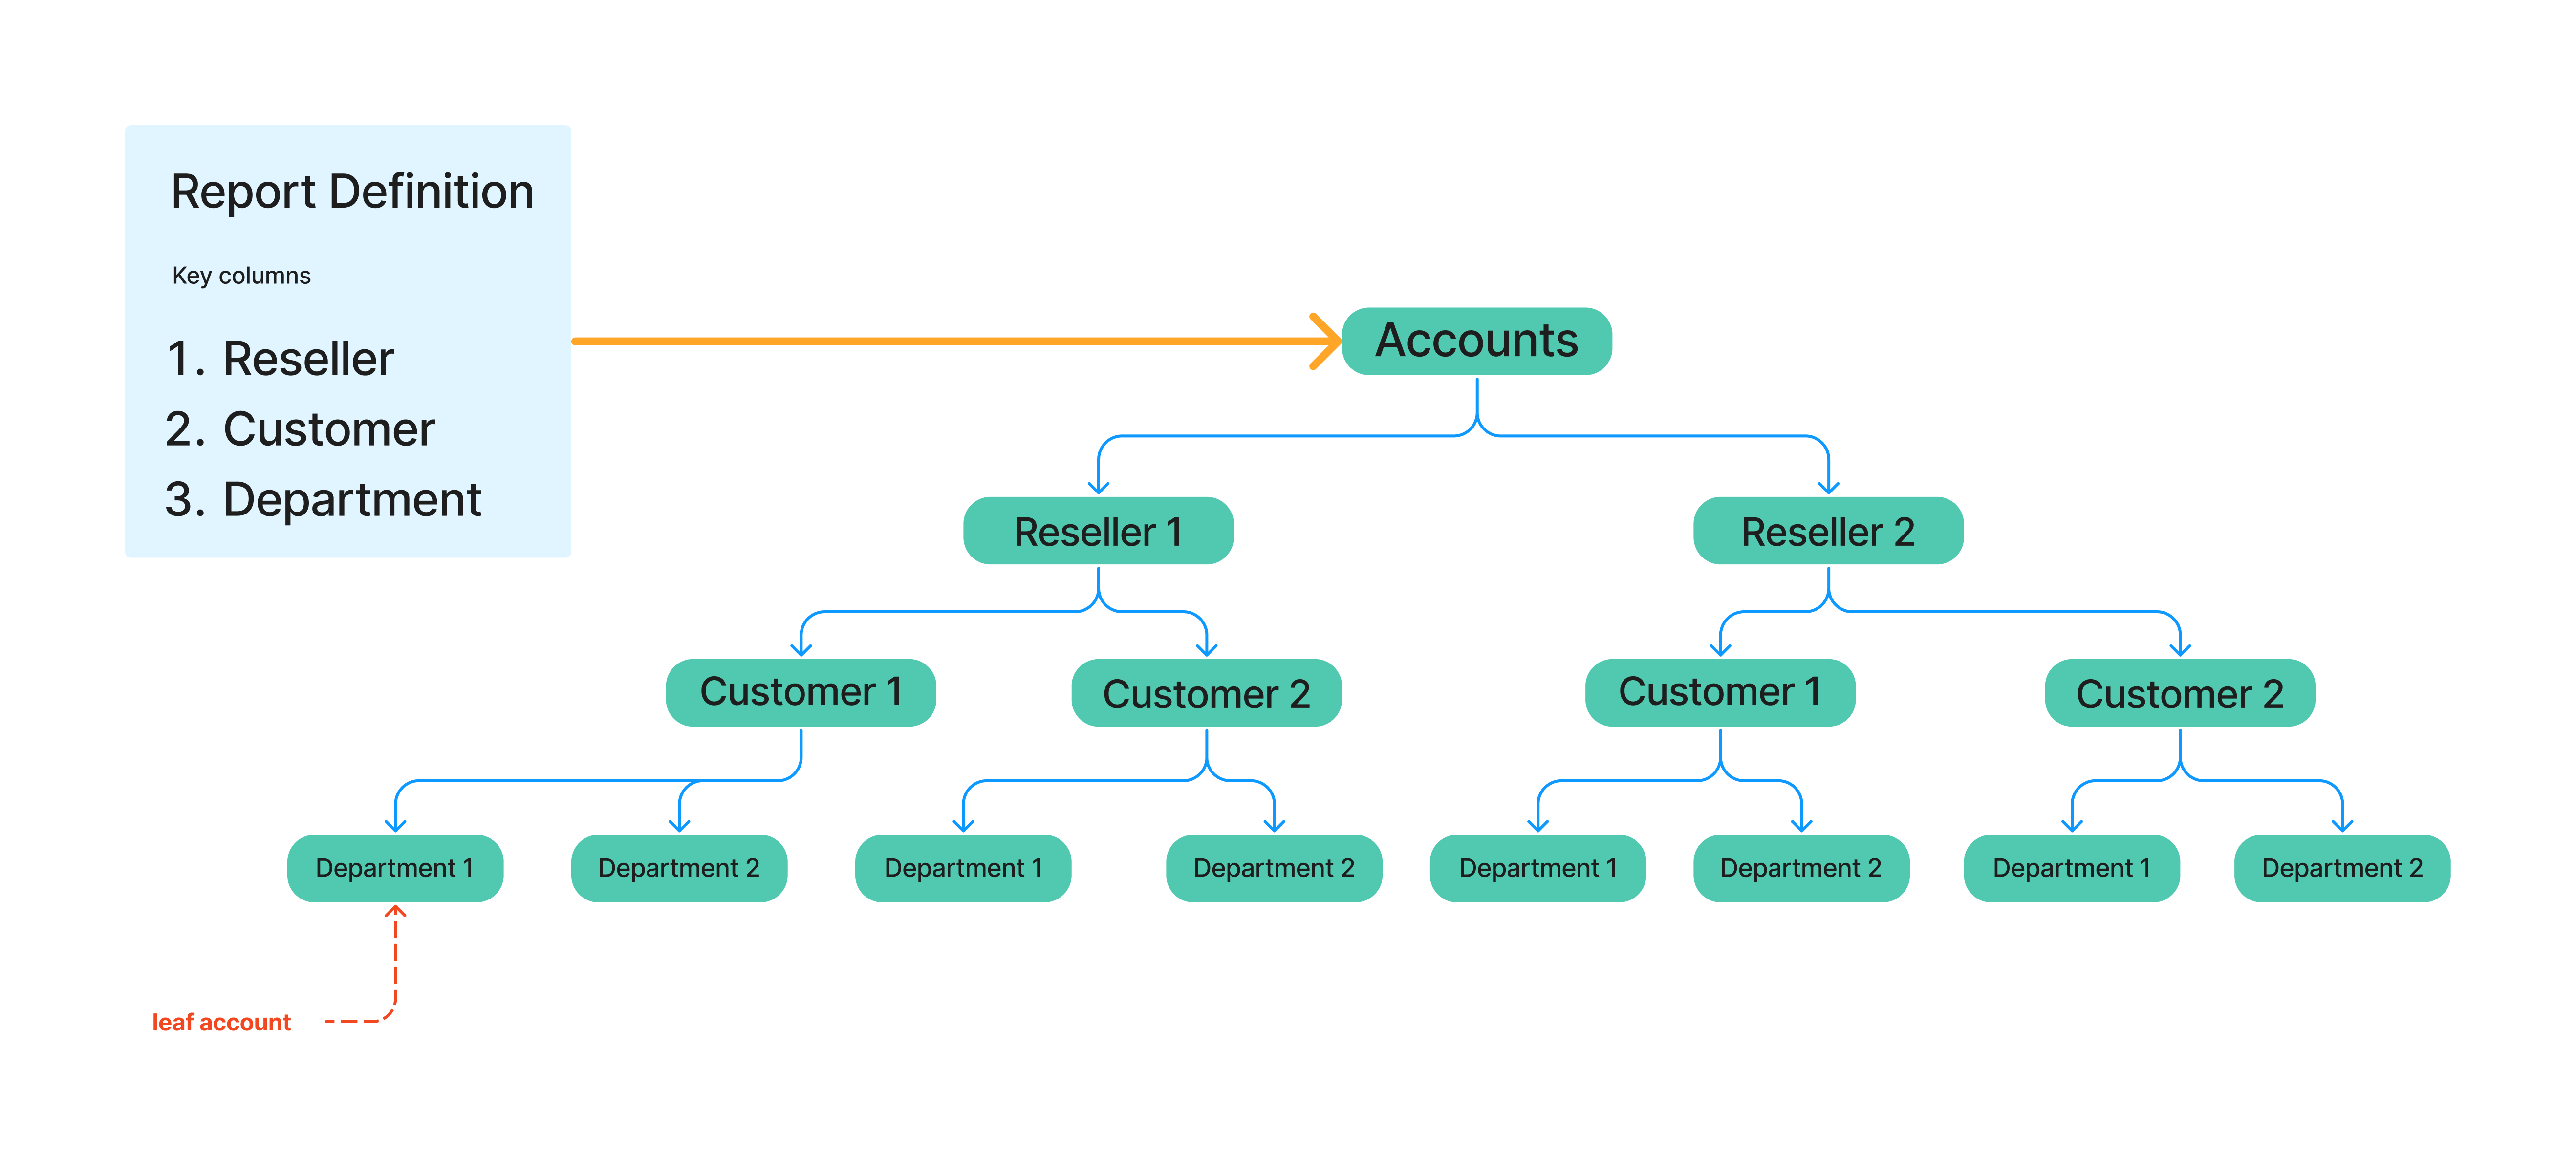
In the above diagram you can observe the mapping between the Report definition creation and the Accounts.
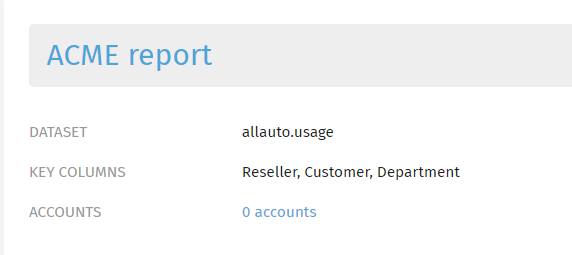
Before preparing the report, you will notice the Accounts number as being equal to 0:
After choosing your desired key columns and successfully preparing the report, you will notice the number of Accounts changes.
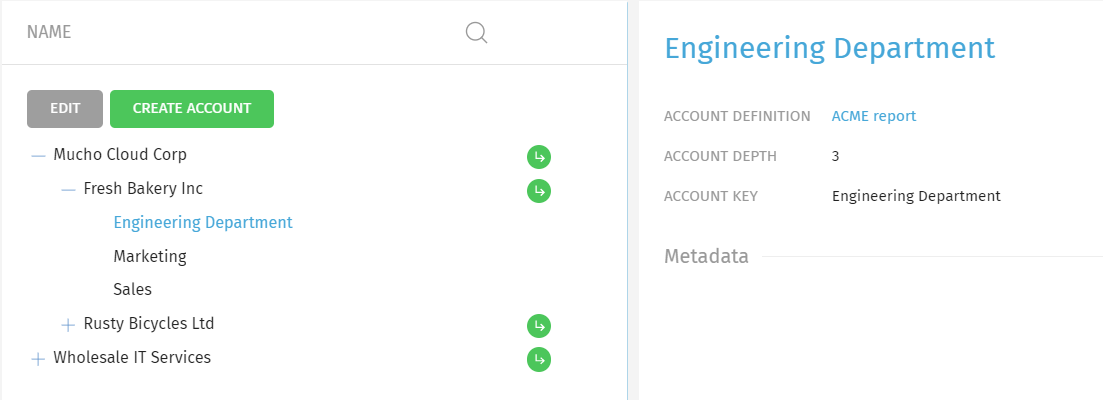
If you click on the number of Accounts, you will be taken to the Account Overview menu. There you will see an hierarchy of your Accounts. By clicking the + sign next to each Account name, you drill-down into lower-level Accounts.
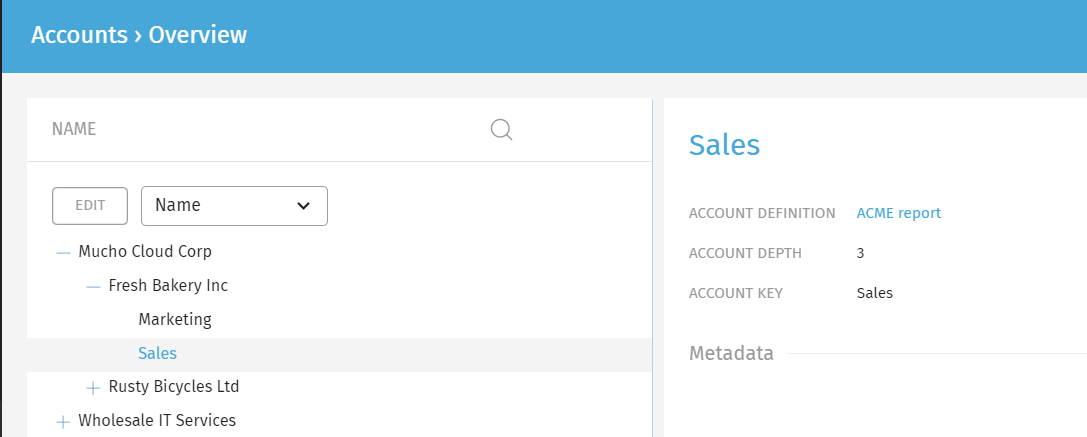
By selecting the Account, you can see a description in the right side of the screen, including the depth level.
The maximum level of depth for Accounts is 5 (since the number of key colums you can include in the Report definiton creation step is also 5).
How to add Accounts manually in the GUI
Let's suppose you created a report definition and you need to add one or more Accounts to it.
Follow these steps to add a new Account:
- Navigate to the Accounts > Overview menu.

-
Click Edit.
-
If you click Create Account, your Account will be created at level 1. If you want to add Accounts on any sub-level, click the green arrow.
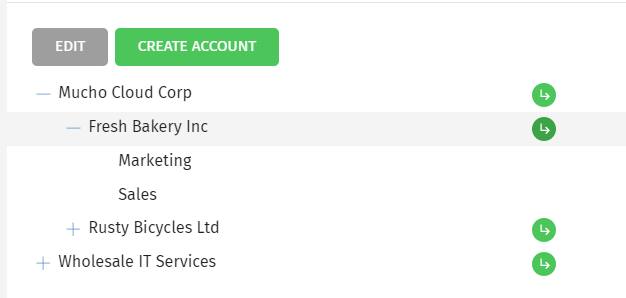
Here we wanted to add an Account at level 3, under the Fresh Bakery Inc Customer at level 2. To achieve that, you must select the green arrow at level 2.
-
To add an Account, fill in the name field and click Create.
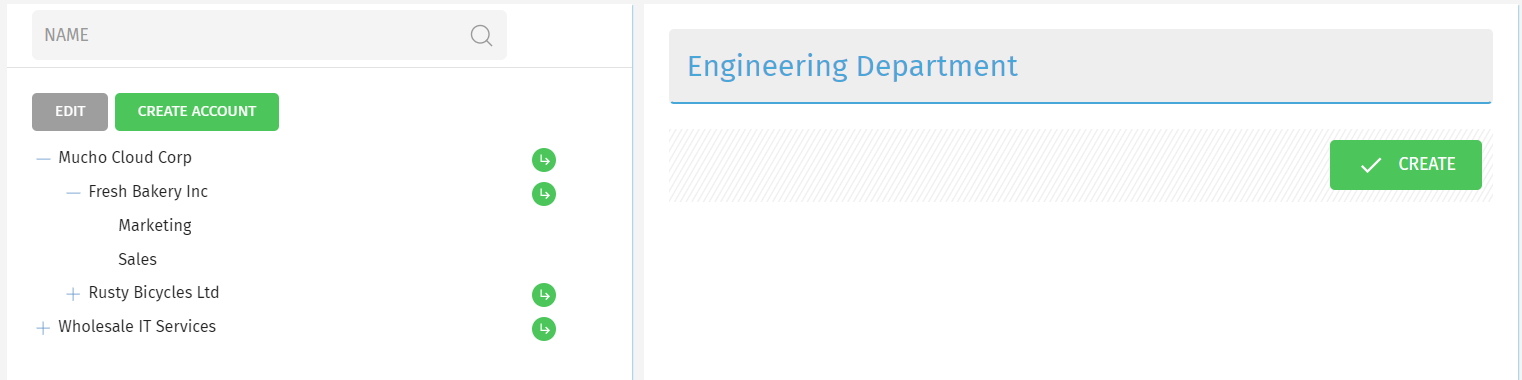
- You can see your newly added Account at the level you created it.